树莓派Raspbian Jessie源码编译安装Nginx网站服务器
这篇教程介绍如何在树莓派Raspbian Jessie系统上编译最新版Nginx源码,并使用Systemd管理Nginx服务。写这篇教程时,最新版本的Nginx是1.9.12。
编译Nginx源码
首先使用wget来下载Nginx的源码。
wget http://nginx.org/download/nginx-1.9.12.tar.gz
下载完后,解压tar.gz文件。
tar xvf nginx-1.9.12.tar.gz
cd新建的nginx目录。
cd nginx-1.9.12/
在这个目录下有一个shell脚本文件configure。我们可以使用file命令来确定一个文件的类型,比如:
file configure

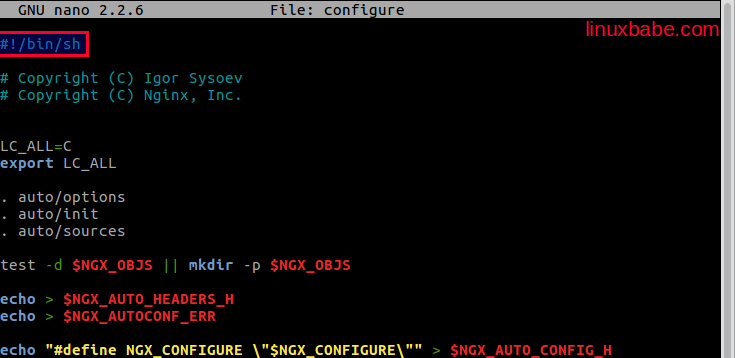
也可以用文本编辑器来打开configure文件,查看其内容。

从第一行的#! /bin/sh可以得知这是一个shell脚本。
在编译之前,我们需要安装一些工具包和库文件。
sudo apt-get install -y curl build-essential make gcc libpcre3 libpcre3-dev libpcre++-dev zlib1g-dev libbz2-dev libxslt1-dev libxml2-dev libgd2-xpm-dev libgeoip-dev libgoogle-perftools-dev libperl-dev libssl-dev libcurl4-openssl-dev
安装后,运行configure脚本。下面是Nginx Mainline版本常用的configure参数。
./configure \
--prefix=/etc/nginx                                                \
--sbin-path=/usr/sbin/nginx                                        \
--conf-path=/etc/nginx/nginx.conf                                  \
--error-log-path=/var/log/nginx/error.log                          \
--http-log-path=/var/log/nginx/access.log                          \
--pid-path=/var/run/nginx.pid                                      \
--lock-path=/var/run/nginx.lock                                    \
--http-client-body-temp-path=/var/cache/nginx/client_temp          \
--http-proxy-temp-path=/var/cache/nginx/proxy_temp                 \
--http-fastcgi-temp-path=/var/cache/nginx/fastcgi_temp             \
--http-uwsgi-temp-path=/var/cache/nginx/uwsgi_temp                 \
--http-scgi-temp-path=/var/cache/nginx/scgi_temp                   \
--user=nginx                                                       \
--group=nginx                                                      \
--with-http_ssl_module                                             \
--with-http_realip_module                                          \
--with-http_addition_module                                        \
--with-http_sub_module                                             \
--with-http_dav_module                                             \
--with-http_flv_module                                             \
--with-http_mp4_module                                             \
--with-http_gunzip_module                                          \
--with-http_gzip_static_module                                     \
--with-http_random_index_module                                    \
--with-http_secure_link_module                                     \
--with-http_stub_status_module                                     \
--with-http_auth_request_module                                    \
--with-mail                                                        \
--with-mail_ssl_module                                             \
--with-file-aio                                                    \
--with-http_v2_module                                              \
--with-ipv6                                                        \
--with-threads                                                     \
--with-stream                                                      \
--with-stream_ssl_module                                           \
--with-http_slice_module
复制上面的代码,粘贴到Raspbian的终端里,再按Enter键。当configure完成后,当前目录下会创建一个Makefile文件以及objs目录。
现在,使用make命令编译Nginx源码。
make
编译完成后,安装Nginx。
sudo make install
创建一个nginx用户以及nginx组。
sudo useradd -r nginx
启动Nginx网站服务器。
sudo nginx
如果你看见下面的错误。
nginx: [emerg] mkdir() "/var/cache/nginx/client_temp" failed (2: No such file or directory)
那么需要手动创建/var/cache/nginx/client_temp文件。
sudo mkdir /var/cache/nginx

sudo touch /var/cache/nginx/client_temp
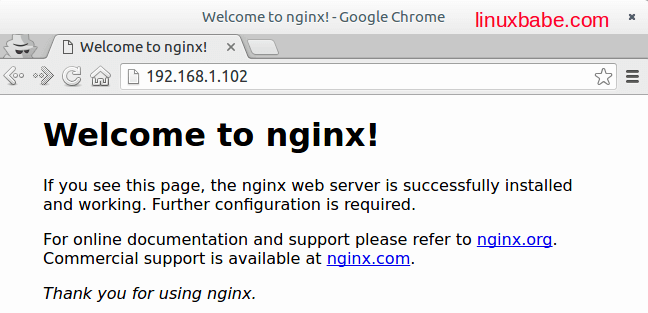
再次启动Nginx网站服务器。在浏览器地址栏输入树莓派的IP地址,你将看见如下内容,意味着Nginx安装成功了。

网站的根目录是/etc/nginx/html/。
使用Systemd管理Nginx服务
Debian Jessie使用Systemd,所以Raspbian Jessie也是使用Systemd。为Nginx创建一个service文件。
sudo nano /lib/systemd/system/nginx.service
将下面的文字粘贴到文件中。
[Unit]
Description=The NGINX HTTP and reverse proxy server
After=syslog.target network.target remote-fs.target nss-lookup.target

[Service]
Type=forking
PIDFile=/var/run/nginx.pid
ExecStartPre=/usr/sbin/nginx -t
ExecStart=/usr/sbin/nginx
ExecReload=/bin/kill -s HUP $MAINPID
ExecStop=/bin/kill -s QUIT $MAINPID
PrivateTmp=true

[Install]
WantedBy=multi-user.target
保存文件。现在杀死nginx进程。
sudo pkill nginx
使用systemctl来启动nginx服务。
sudo systemctl start nginx
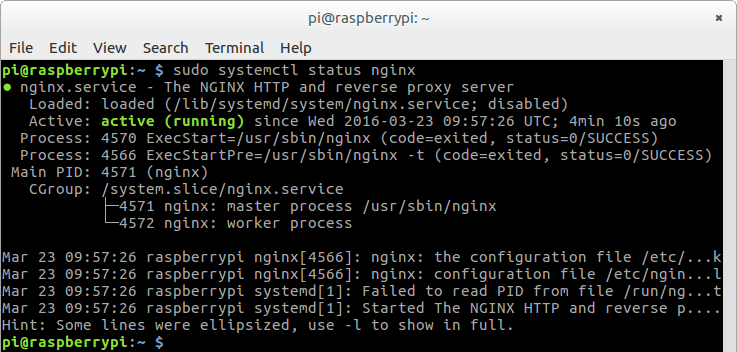
查看nginx状态。
sudo systmctl status nginx

设置开机自启动。
sudo systemctl enable nginx
好了!我们成功地在树莓派Raspbian Jessie系统上编译了Nginx源码,安装Nginx,并能使用Systemd来管理Nginx服务。


